Understanding the GE Smart Water Filter System
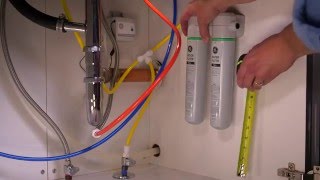
The GE Smart Water Filter (often referenced by model numbers such as GXWH70M) is a popular choice for homeowners looking to improve tap water quality while enjoying the convenience of a connected appliance. This filter is designed to work with GE’s Smart Dispensing Series refrigerators, providing a reliable barrier against chlorine, lead, and other common contaminants. When the filter reaches the end of its service life, the system alerts you through the refrigerator’s display, prompting a replacement to maintain optimal performance.
Why Replacing the Filter Matters
Replacing the filter at the recommended interval (typically every six months or after filtering 300 gallons) ensures:
- Consistent taste and odor removal – a fresh filter continues to reduce chlorine and other off‑flavors.
- Protection for your refrigerator’s water dispenser – clogged filters can strain the pump and reduce flow.
- Extended filter lifespan – timely changes prevent premature wear on the filter housing.
Quick Walk‑Through: How to Change Your GE Smart Water Filter
Below is a step‑by‑step guide for swapping out the GE Smart Water Filter, whether you have a standard MWF, MWFP, or the newer MWFA version. The process is similar for the GXWH70M model, which is commonly installed in newer GE refrigerators.
Tools and Materials Needed
- Replacement GE Smart Water Filter (compatible model: GXWH70M, MWF, MWFP, or MWFA).
- A clean, dry towel to catch any residual water.
- A small flashlight (optional) for better visibility inside the filter compartment.
Step‑by‑Step Replacement Procedure
- Locate the filter compartment. Open the refrigerator door and look for the filter housing, usually on the interior wall near the water dispenser.
- Remove the old filter. Turn the filter knob clockwise until it releases, then pull the filter straight out. Have the towel ready to absorb any drips.
- Prepare the new filter. Remove the protective cap and any shipping seals. Align the filter’s O‑ring with the housing groove.
- Insert the new filter. Slide the filter into the housing, then turn the knob counter‑clockwise until it clicks into place. Ensure the filter is snug but not overtightened.
- Flush the system. Close the refrigerator door, then dispense water for about 2‑3 minutes (approximately 2 gallons) to clear any air bubbles and prime the filter.
- Reset the filter indicator. Use the refrigerator’s control panel to acknowledge the new filter. This typically involves holding the “Filter Reset” button for a few seconds.
Common Mistakes to Avoid
Even a simple task like changing a filter can go awry if you overlook a few details. Here are the most frequent errors and how to prevent them:
- Skipping the flush step. Not flushing the new filter can leave air pockets, resulting in slow water flow or a metallic taste.
- Using the wrong filter model. Verify that your replacement matches the refrigerator’s part number (e.g., GXWH70M) to avoid compatibility issues.