How Do You Open Smart Water Bottles – A Practical Guide
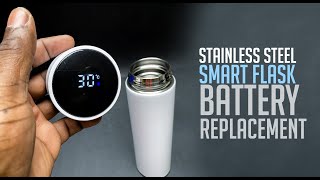
Smart water bottles combine hydration tracking, temperature monitoring, and LED displays into a single stainless‑steel container. Whether the LED temperature display is not working, the battery needs replacement, or you simply want to clean the interior, the first step is opening the device safely. This article walks you through the process, the tools required, and common troubleshooting tips.
What Makes a Smart Water Bottle Different?
Traditional bottles rely on a simple lid, but smart bottles contain:
- A rechargeable or replaceable battery
- Integrated sensors that detect temperature and volume
- An LED or LCD panel that shows real‑time data
- Sealed electronics that protect against moisture
Because of these components, the opening method is more involved than unscrewing a regular cap.
Tools and Materials You’ll Need
- Small Phillips‑head screwdriver – most smart bottles use a #0 or #1 size.
- Flat‑head screwdriver or spudger – for prying gently at seams.
- Plastic opening tool – prevents scratches on the stainless‑steel surface.
- Replacement battery – typically a CR2032 coin cell or a custom Li‑ion pack (check the manufacturer’s specifications).
- Soft cloth – to wipe away dust after opening.
Step‑by‑Step Guide to Opening a Smart Water Bottle
Follow these steps to access the interior without damaging the electronics:
- Power down the device. If the bottle has a power button, press and hold until the LED display turns off. This prevents accidental short‑circuits.
- Remove the outer sleeve. Many models have a silicone or rubber sleeve that slides off the metal body. Pull it away gently; it often hides the seam where the lid meets the bottle.
- Locate the hidden screw. Look for a small screw at the base of the lid or underneath a decorative badge. Use the Phillips‑head screwdriver to loosen it. In some designs the screw is concealed under a rubber seal – lift the seal with the flat‑head screwdriver first.
- Separate the lid from the body. After the screw is removed, insert the plastic opening tool at the seam and twist slowly. The lid should pop free with a faint click. If resistance is felt, re‑check for any remaining screws.
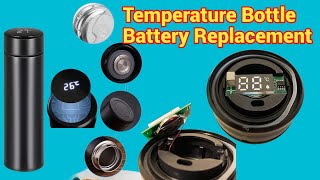
- Access the battery compartment. Inside the lid, you’ll see a small plastic cover protecting the battery. Lift it with the spudger, then replace the old battery with a new one, ensuring the positive (+) side faces the correct direction.
- Reassemble the bottle.