How To Hook Smart TV To WiFi: A Step-by-Step Guide
Are you ready to unlock a world of digital content right from your living room couch? Connecting your smart TV to WiFi is a straightforward process that can transform your viewing experience. In this article, I show you the seamless process of hooking your smart TV to WiFi, ensuring you can stream movies, TV shows, and more with ease.
Why Connect Your Smart TV to WiFi?
Connecting your smart TV to WiFi is essential for accessing a vast array of online content. Whether you are using a Samsung, LG, Sony, or any other brand, WiFi connectivity allows you to browse the internet, stream videos, and enjoy various apps. It's a simple yet powerful step that enhances your entertainment experience.
Gather Your Tools
Before you begin, make sure you have the following tools ready:
- A smart TV with WiFi capabilities
- A WiFi network name (SSID) and password
- A remote control
Step-by-Step Guide to Connecting Your Smart TV to WiFi
Step 1: Power On Your Smart TV
Turn on your smart TV using the power button on the remote control. Allow it to boot up completely.
Step 2: Access the Network Settings
Using your remote, navigate to the settings menu. The process may vary slightly depending on your TV brand, but generally, you can find the settings by pressing the "Settings" button on your remote.
Once in the settings menu, look for the "Network" or "Connections" option. Select it to proceed.
Step 3: Select WiFi
In the network settings, you should see an option to connect to WiFi. Select this option to begin the connection process.
Step 4: Choose Your WiFi Network
Your smart TV will scan for available WiFi networks. Locate your network from the list and select it.
Step 5: Enter Your WiFi Password
You will be prompted to enter the password for your WiFi network. Type it in carefully using your remote's number pad.
Step 6: Connect to the Network
After entering the password, your smart TV will attempt to connect to the WiFi network. This process may take a few moments.
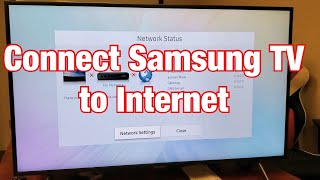
Step 7: Verify the Connection
Once connected, your smart TV will display a confirmation message. To ensure the connection is stable, you can open a web browser or an app to test the internet connectivity.
Troubleshooting Common Issues
While connecting your smart TV to WiFi is usually straightforward, you might encounter some common issues. Here are a few tips to troubleshoot:
Issue: Weak WiFi Signal
If your TV is not connecting to WiFi, it could be due to a weak signal. Try moving your TV closer to the WiFi router or consider using a WiFi extender to boost the signal.
Issue: Incorrect Password
Double-check the WiFi password you entered. Ensure there are no typos or incorrect characters. If you're unsure, you can reset the network settings and try again.
Issue: Unsupported WiFi Band
Some smart TVs only support the 2.4 GHz WiFi band. If your router uses the 5 GHz band, you might need to change the router settings to accommodate your TV.
Conclusion
Connecting your smart TV to WiFi is a simple process that can significantly enhance your viewing experience. By following the steps outlined in this guide, you can easily unlock a world of digital content right from your living room. Whether you are using a Samsung, LG, Sony