How to Set Up a Smart TV: A Complete Step‑by‑Step Guide
Ready to turn your new Smart TV into a personal entertainment hub? Below you’ll find everything you need to know, from unboxing to streaming, so you can start watching without the hassle of cable. I show you how to set up a Smart TV quickly, safely, and efficiently.
1. Unbox and Position Your TV
Before you can enjoy any content, you must first get the TV out of the box and place it correctly.
- Remove the TV carefully and set it on a stable surface or mount it on the wall following the manufacturer’s instructions.
- Check the accessories – power cord, remote (with batteries), HDMI cables, and any optional soundbars or streaming sticks.
- Leave space around the TV for ventilation and easy access to ports.
2. Connect Power and Essential Cables
While you’re still setting up, plug the power cord into a surge‑protected outlet. Connect any external devices you plan to use:
- HDMI cable for a soundbar, gaming console, or Blu‑ray player.
- Optical audio cable if you prefer a separate audio system.
- Ethernet cable (optional) for a more stable internet connection.
3. Power On and Run the Initial Setup Wizard
Turn on the TV using the remote. Most Smart TVs launch an on‑screen wizard that guides you through language selection, location, and basic preferences. Follow the prompts, and you’ll be ready to connect to the internet.
4. Connect to the Internet
Here’s how to get online:
- Open the Settings menu with the remote.
- Select Network or Internet.
- Choose Wi‑Fi and pick your network from the list.
- Enter the Wi‑Fi password and confirm.
If you prefer a wired connection, select Wired (Ethernet) and plug the cable into the TV’s Ethernet port. While testing the connection, make sure the router is broadcasting and that the TV is within range.
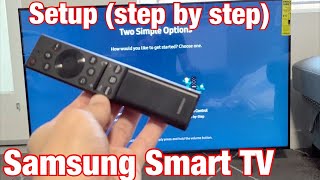
5. Create or Sign In to Your Smart TV Account
Most brands require a user account to access apps and updates. I show you how to set it up:
- Navigate to Account or Login in the settings.
- Choose Create New Account if you don’t have one, or sign in with an existing Google, Samsung, or LG account.
- Enter your email, create a strong password, and follow any verification steps (email link or two‑factor authentication).
Having an account also lets you sync preferences across devices and receive personalized recommendations.
6. Update Firmware
Learn why this matters: firmware updates improve performance, add new features, and patch security holes. Most TVs check for updates automatically during the initial setup, but you can manually verify:
- Go to Settings > Support > Software Update.
- Select Check for Updates and install any available version.
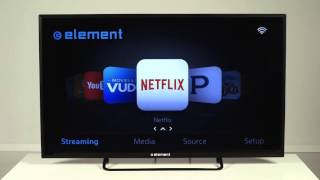
7. Install Your Favorite Streaming Apps
Now that you’re online, it’s time to add the services you love. Here’s a quick way to do it:
- Open the App Store or Google Play Store on the TV.
- Search for apps such as Netflix, Hulu, Amazon Prime Video, Disney+, or any local streaming service.
- Select the app, click Install, and wait for the download to finish.
- Open the app, sign in with your subscription credentials, and you’re ready to stream.
While you’re in the store, consider adding utility apps like a weather widget, a news channel, or a YouTube app for free content.
8. Optimize Picture and Sound Settings
Every TV looks different out of the box. Learn how to fine‑tune the experience:
- Picture Mode: Choose Standard, Cinema, Vivid, or Game based on your viewing habits.
- Brightness & Contrast: Adjust to avoid washed‑out blacks in dark rooms.
- Color Temperature: Warm for movies, cool for sports.
- HDR: Enable High Dynamic Range if your TV supports it for richer colors.
- Sound: Select Stereo, Dolby Atmos, or Surround depending on your audio setup.
If you have a soundbar or external speaker system, set the TV’s audio output to HDMI ARC or Optical to route sound correctly.
9. Connect Additional Devices (Optional)
While many users rely solely on streaming apps, you might want to add:
- A gaming console (PlayStation, Xbox, Nintendo Switch) via HDMI.
- A Blu‑ray or DVD player for physical media.
- A universal remote or smart home hub for voice control.
Make sure each device is set to the correct HDMI input and that any required CEC (Consumer Electronics Control) settings are enabled for seamless switching.
10. Cut the Cable and Embrace Streaming
I've been helping people cut the cable for years, and the transition is easier than you think. Here’s a quick checklist to ensure you’re ready:
- Confirm that all your favorite channels are available through streaming services or live‑TV apps.
- Set up a reliable internet plan (at least 25 Mbps for 4K streaming).
- Consider a digital antenna if you still want free over‑the‑air broadcast channels.
- Cancel or pause your cable subscription once you’ve verified the new setup works.
By following these steps, you’ll enjoy a clutter‑free living room and lower monthly bills.
11. Final Tips and Troubleshooting
- Keep the TV firmware up to date to avoid glitches.
- Use a wired Ethernet connection if Wi‑Fi is unstable, especially for 4K content.
- Restart the TV if an app freezes—often a quick power cycle solves the issue.
- Factory reset as a last resort: Settings > General > Reset.
Conclusion
Setting up a Smart TV is a straightforward process that combines a few physical steps with some on‑screen configuration. Learn how to connect to the internet, create an account, install apps, and fine‑tune picture and sound. I show you how to make the most of your new device while cutting the cable, so you can enjoy a world of entertainment at your fingertips. Follow this guide, and you’ll be streaming, gaming, and browsing in minutes.


![TCL Google TV: How To Setup for Beginners! [First Time]](https://i.ytimg.com/vi/4BcxCt95Hak/mqdefault.jpg)


