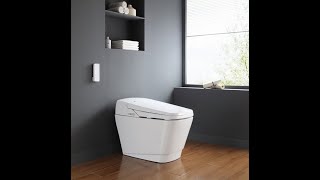
Ove Tuva Smart Toilet – A Modern Upgrade for Every Bathroom
The Ove Tuva Smart Toilet combines sleek aesthetics with advanced functionality, delivering a bathroom experience that is both comfortable and efficient. Designed for homeowners who value technology and style, the Tuva model stands out in OVE’s growing lineup of smart fixtures.
Key Features at a Glance
- Tank‑less design – OVE’s slim tankless architecture reduces water consumption while freeing up space under the bowl.
- Touch‑free flushing – Infrared sensors detect user presence and activate a powerful flush without the need for a handle.
- Bidet functionality – Adjustable water pressure and temperature settings provide a customizable clean.
- Self‑cleaning nozzle – An automatic cleaning cycle keeps the spray tip hygienic after each use.
- Smart pairing – The toilet can be linked to OVE’s mobile app for remote monitoring and maintenance alerts.
Design & Technology – Why the Slim Tankless Concept Matters
OVE’s slim tankless design combines innovative technology with a minimalist look. By eliminating the traditional bulk‑filled tank, the Tuva model reduces overall weight and simplifies installation. The space‑saving profile also allows the toilet to fit comfortably in smaller bathrooms without compromising on performance.
Advanced electronics control the flushing mechanism, delivering a high‑efficiency vortex that clears waste with less water than conventional models. The system’s Intelligent Bidet Assistant (IBA) learns user preferences over time, suggesting optimal spray settings for comfort and hygiene.
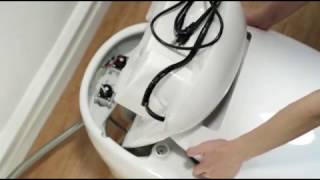
Installation Made Simple
Installing the Ove Tuva Smart Toilet follows the same straightforward steps highlighted in the OVE Clarke Smart Toilet Installation Video. Below is a concise outline for a typical DIY installation:
- Turn off the main water supply and disconnect the existing toilet.
- Remove the old flange and clean the floor surface.
- Place the supplied mounting bolts and align the Tuva base plate.
- Secure the toilet bowl to the bolts, ensuring a level fit.
- Connect the power adapter to a nearby outlet and attach the water line to the inlet port.
- Test the flush and bidet functions before sealing the floor with caulk.
For more detailed guidance, the OVE Stan Smart Toilet – How to Replace Solenoid video