Raspberry Pi Smart Mirror: A Complete DIY Guide
Smart mirrors are becoming a popular way to blend everyday information with a sleek, reflective surface. By using a Raspberry Pi as the brain of the system, you can create a fully customizable display that shows time, weather, calendar events, news headlines, and even personal notifications. This article walks you through everything you need to know to build a Raspberry Pi Smart Mirror from scratch, add optional face detection, and keep the project running smoothly.
What Is a Smart Mirror?
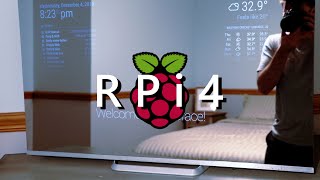
A smart mirror is essentially a two-way mirror with a digital display hidden behind it. When the screen is off, the mirror looks like a regular glass mirror. When the display is on, the content shines through the glass, creating a seamless overlay of information on the reflective surface. The Raspberry Pi provides the processing power needed to run the software, while a monitor or LCD panel supplies the visual output.
Required Components
- Raspberry Pi 4 (4 GB or 8 GB model recommended)
- Micro‑SD card (32 GB or larger, Class 10)
- HDMI‑compatible monitor or LCD panel (size 21‑27 in works well)
- Two‑way acrylic or glass mirror
- Power supply for the Pi (5 V / 3 A USB‑C)
- USB webcam (optional, for face detection)
- Keyboard and mouse for initial setup
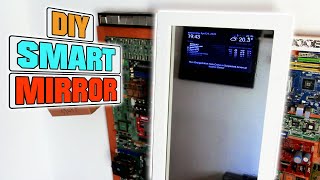
- Mounting frame or enclosure (DIY wood frame, 3‑D‑printed case, etc.)
All of these parts are readily available from electronics retailers such as Digi‑Key. For additional project ideas, see the Digi‑Key Maker Projects page.
Step‑by‑Step Build Guide
1. Prepare the Raspberry Pi
Download the latest Raspberry Pi OS and flash it onto the micro‑SD card using a tool like Raspberry Pi Imager. After the first boot, run sudo apt update && sudo apt upgrade -y to ensure the system is up to date.
2. Install the MagicMirror² Platform
MagicMirror² is the most widely used open‑source framework for smart mirrors. Open a terminal and execute the following commands:
bash -c "$(curl -sL https://raw.githubusercontent.com/MichMich/MagicMirror/master/installers/raspberry.sh)"This script installs all required dependencies, clones the MagicMirror repository, and sets up a systemd service that launches the mirror on boot.
3. Mount the Monitor Behind the Two‑Way Mirror
Place the monitor flat against the back of the two‑way mirror. Use a sturdy frame or brackets to keep the screen from shifting. Make sure the monitor’s bezel does not block the reflective area you want to use.
4. Configure the Display Settings
Edit /boot/config.txt to enable HDMI output at the correct resolution. For a 1080p monitor, add:
hdmi_group=1 hdmi_mode=16Save the file and reboot the Pi.
5. Customize MagicMirror Modules
Open ~/MagicMirror/config/config.js and enable or disable modules to match your needs. Common modules include:
- clock – shows the current time.
- weather – displays local weather conditions.
- calendar – pulls events from Google Calendar.
- newsfeed – lists headlines from RSS feeds.
Adjust the position and header fields to arrange the layout on the mirror surface.
Adding Face Detection for Personalization
If you want the mirror to react only when someone is in front of it, you can integrate a simple face detection module. The compiled face detection image is available on our website: https://smartbuilds.io/. Follow these steps:
- Download the face-detection binary and place it in /home/pi/face-detection.
- Install the required Python libraries: pip install opencv-python numpy.
- Modify config.js to add the MMM-Detection module, pointing it to the webcam device (usually /dev/video0).
- Configure the module to hide or show other modules based on the detected flag.
With this setup, the mirror will automatically dim the display when no face is detected, conserving power and extending the life of the screen.
Customizing the Visual Design
Beyond the default MagicMirror theme, you can personalize fonts, colors, and backgrounds. Edit the css/custom.css file to add your own style rules. For example, to change the clock font:
.clock .time { font-family: "Roboto", sans-serif; color: #00ffcc; font-size: 4rem; }Consider adding a photo slideshow module that displays family pictures or inspirational quotes. The MMM-ImageSlideshow module works well and can be set to change images every few minutes.
Tips for Reliability and Longevity
- Power Management: Use a quality 5 V / 3 A power supply and consider a UPS hat for the Pi if you need uninterrupted operation.
- Heat Dissipation: Install a small fan or passive heatsink on the Raspberry Pi to keep temperatures below 70 °C.
- Screen Protection: Apply a thin anti‑glare film to the monitor to reduce reflections from ambient light.
- Software Updates: Schedule a weekly sudo apt update && sudo apt upgrade -y via a cron job to keep the system secure.
Conclusion
Building a Raspberry Pi Smart Mirror is an accessible project for hobbyists and makers who want to combine practical information with a modern aesthetic. By following the steps outlined above—preparing the Pi, installing MagicMirror², adding optional face detection, and fine‑tuning the visual layout—you can create a functional and stylish mirror that fits any home or office environment. For further inspiration, explore additional tutorials on our channel, where we demonstrate how to integrate voice assistants, IoT sensors, and custom widgets into your smart mirror.